OpenVPN for Linux Installation Guide
This document will guide you through the installation process of OpenVPN for Linux Fedora and Ubuntu. For other operating systems, visit here.
Remote access requires the use of Multi-Factor Authentication. If you haven't set this up for your IAS account, please see our information page or contact the Computing Helpdesk for DuoSecurity before continuing.
Command Line configuration:
To start, open a terminal.

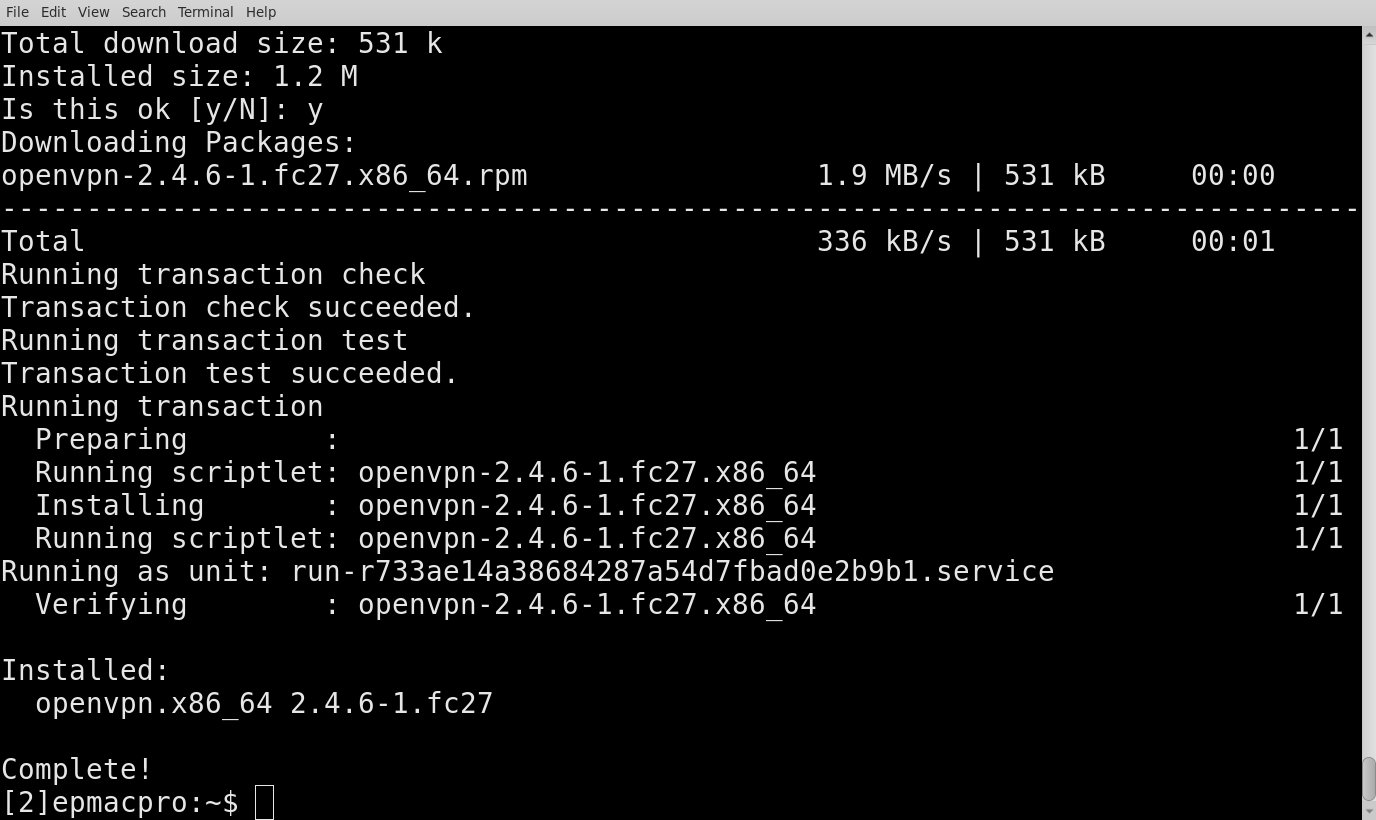
Install the OpenVPN client. For RedHat based systems (CentOS, Springdale LInux, Fedora), type "sudo yum install openvpn". You will be asked to verify the download is okay. To proceed, type "y" and press "Enter".
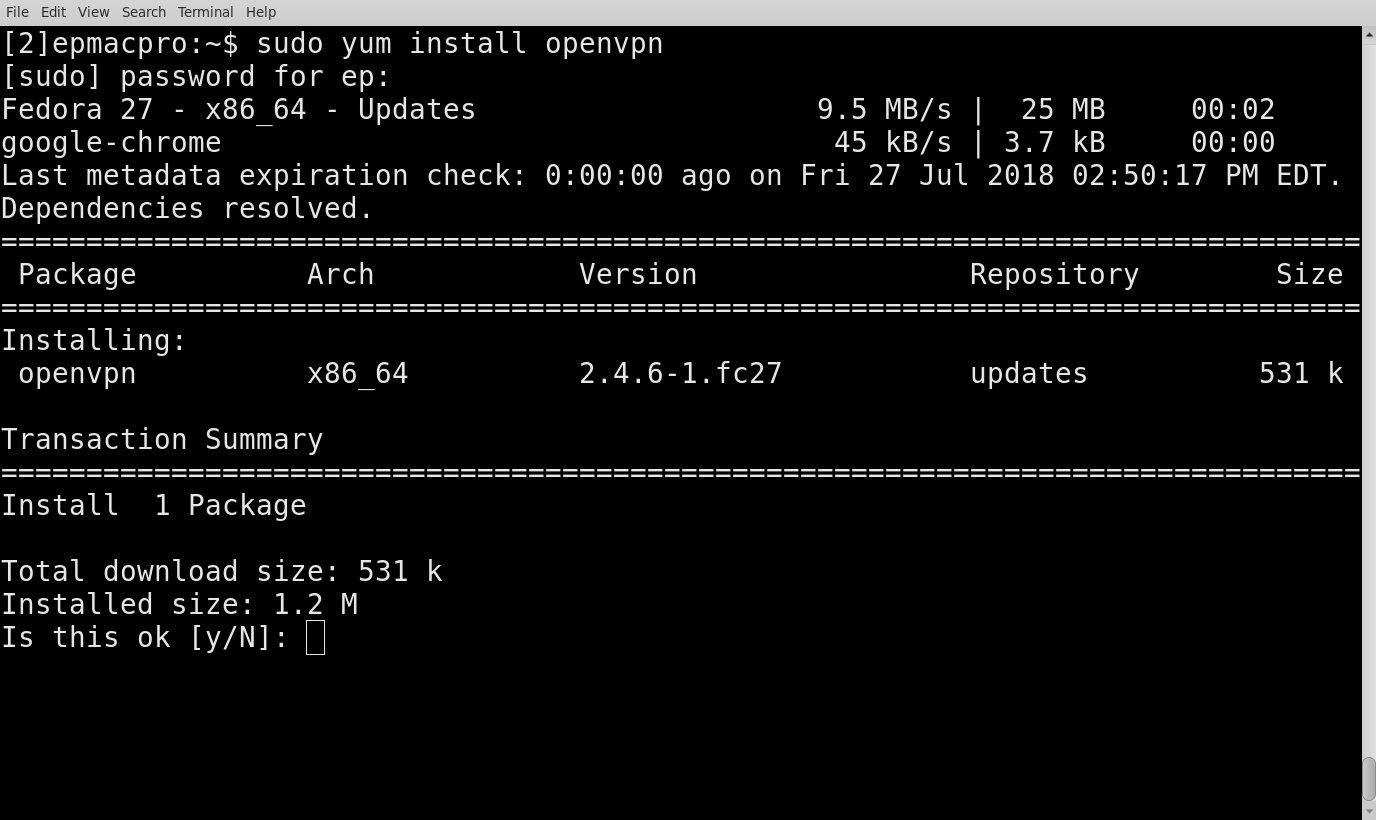
You will see a verification of the package you installed along with a message telling you the download is complete.
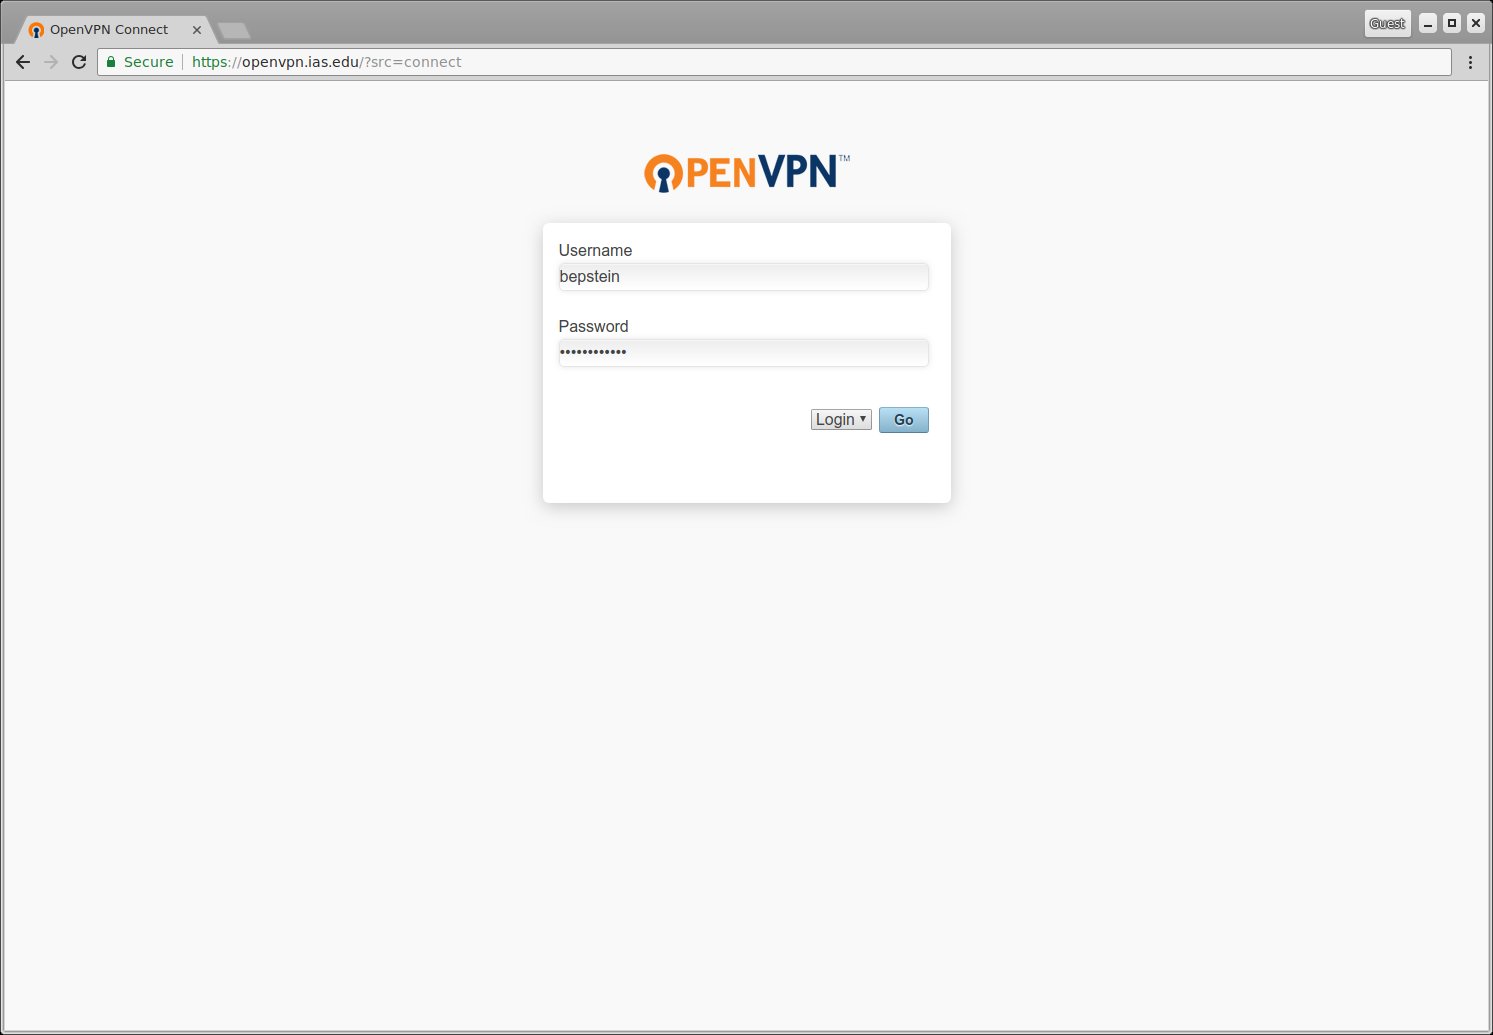
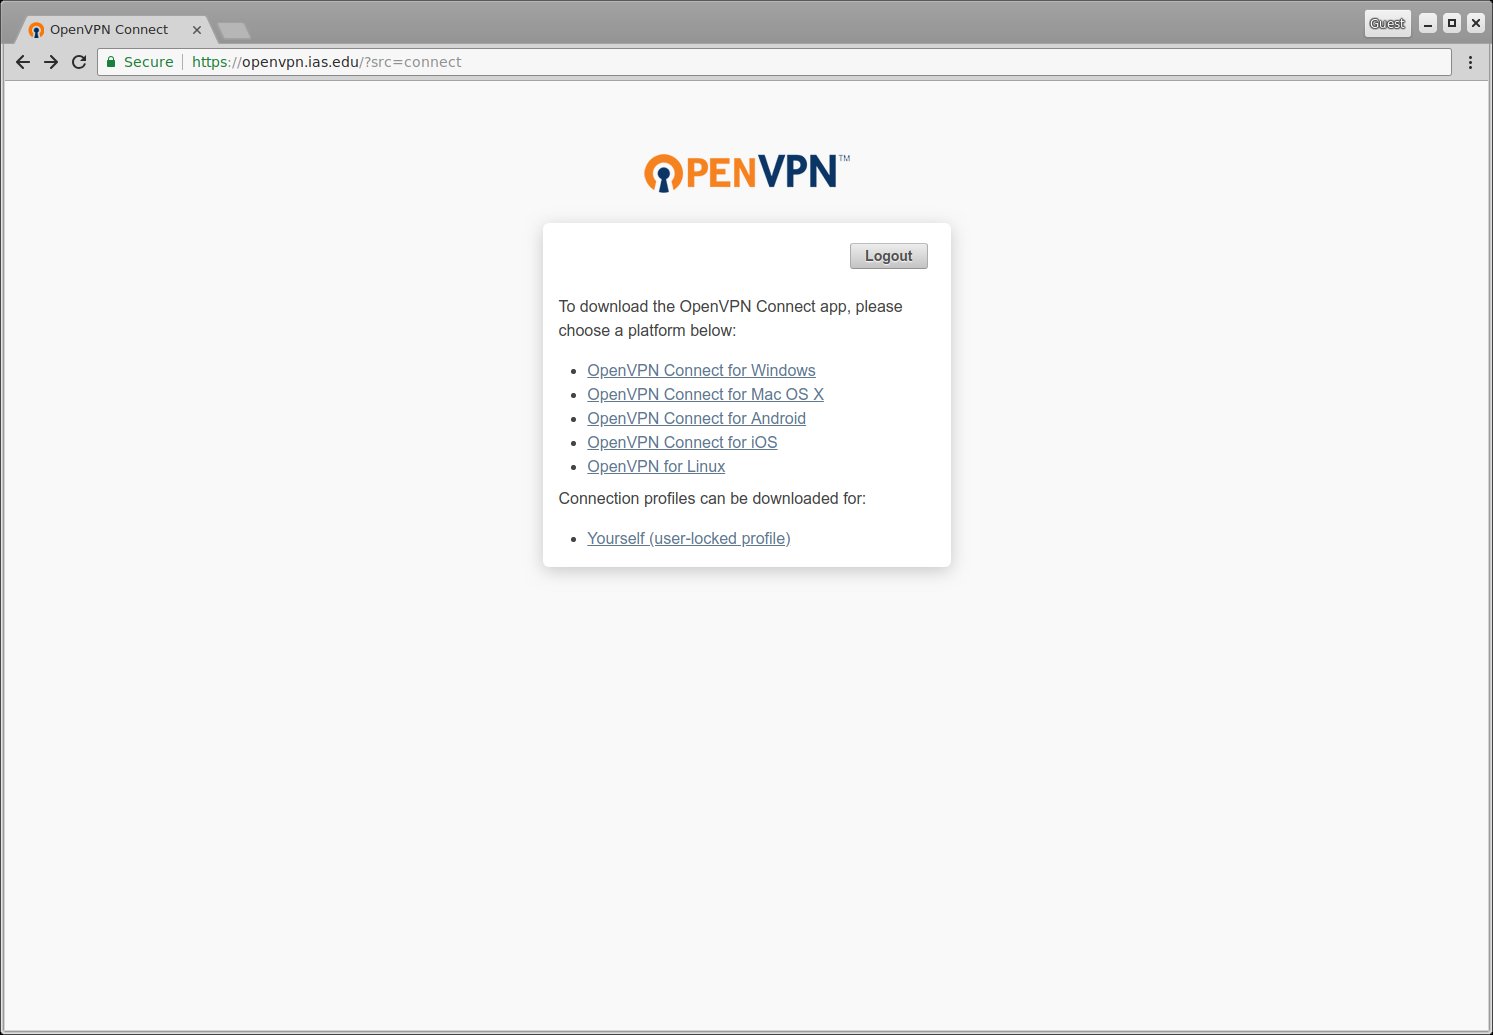
In your browser, navigate to https://openvpn.ias.edu. Enter your IAS credentials and then press "Go".
Click on "Yourself (user-locked profile)" to download your OpenVPN profile. Make sure this download goes into your Download folder. This will be the default download location unless you have changed it.

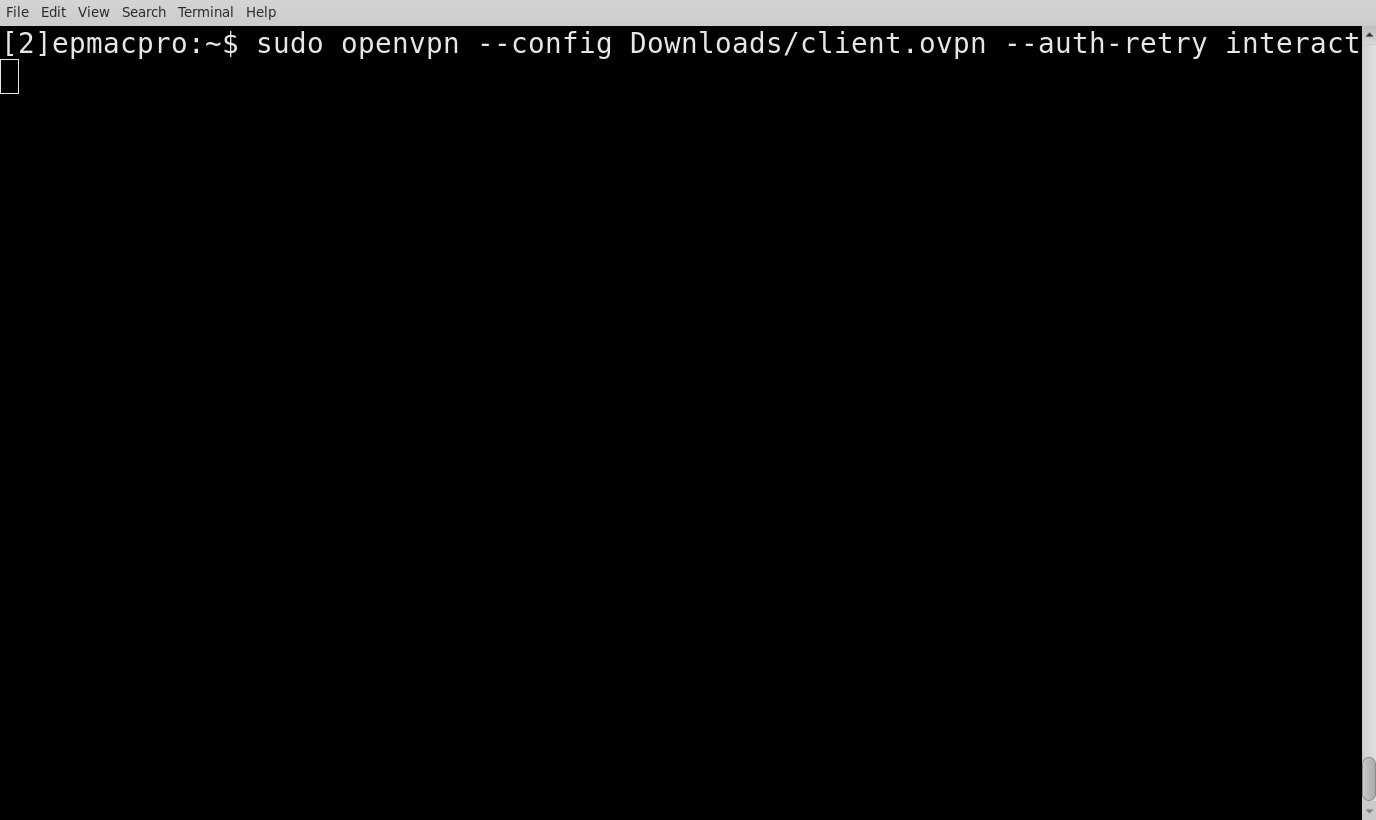
In your terminal type the following command (all Linux variants):
"sudo openvpn --config Downloads/client.ovpn --auth-retry interact"
You will be prompted to enter your IAS credentials. Enter your credentials then enter to proceed. If you use 2-factor authentication, you will be prompted to enter your Duo passcode.

Hit CTRL-C to exit. You should also see your new ip address if you run "ip addr" or "ifconfig" in another terminal window.
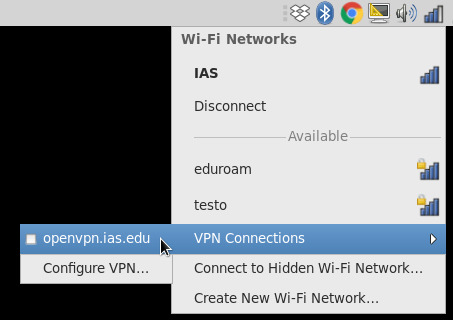
Network Manager configuration:
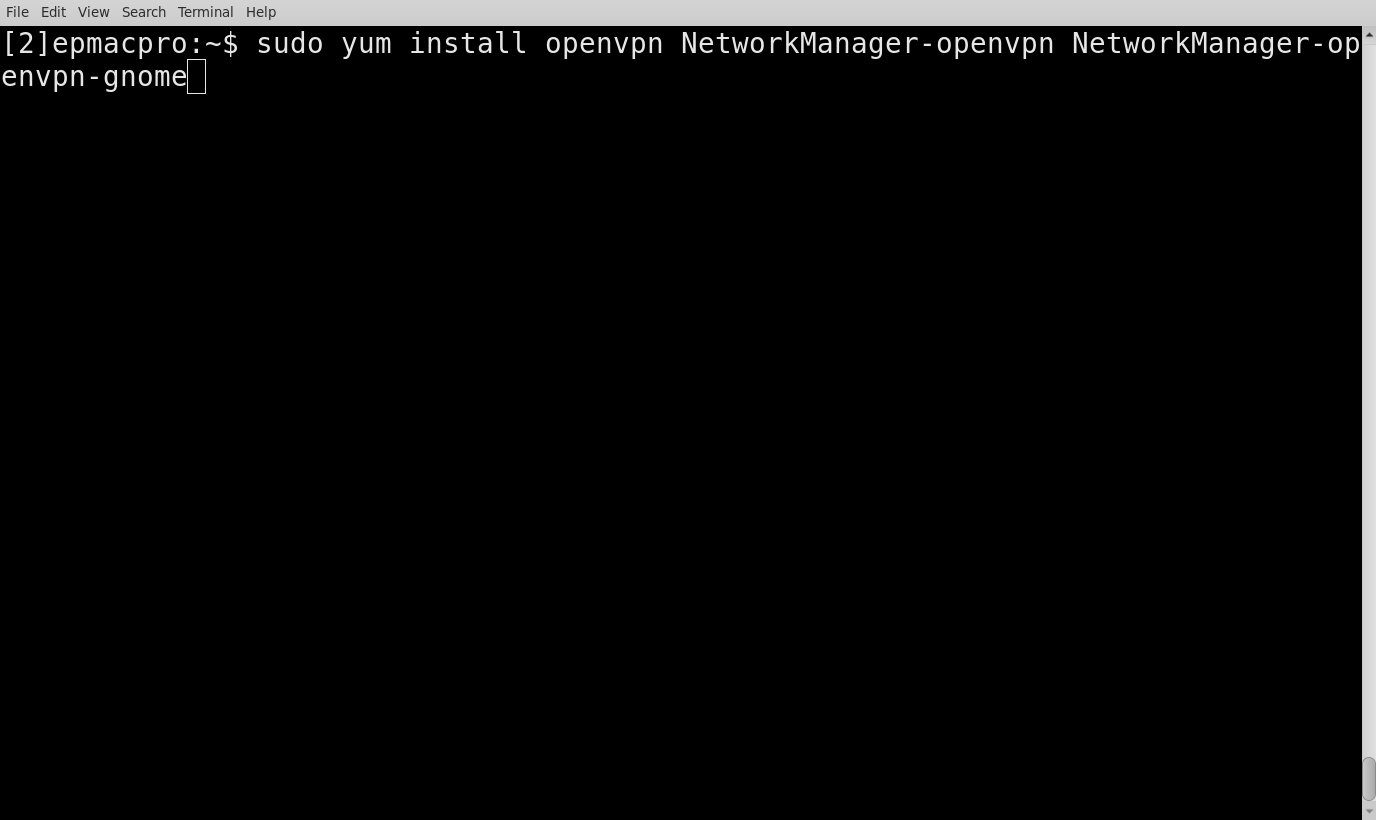
Open a terminal and install the Network Manager plugins for OpenVPN and Gnome:
For RedHat based system, type "sudo yum install openvpn NetworkManager-openvpn NetworkManager-openvpn-gnome"
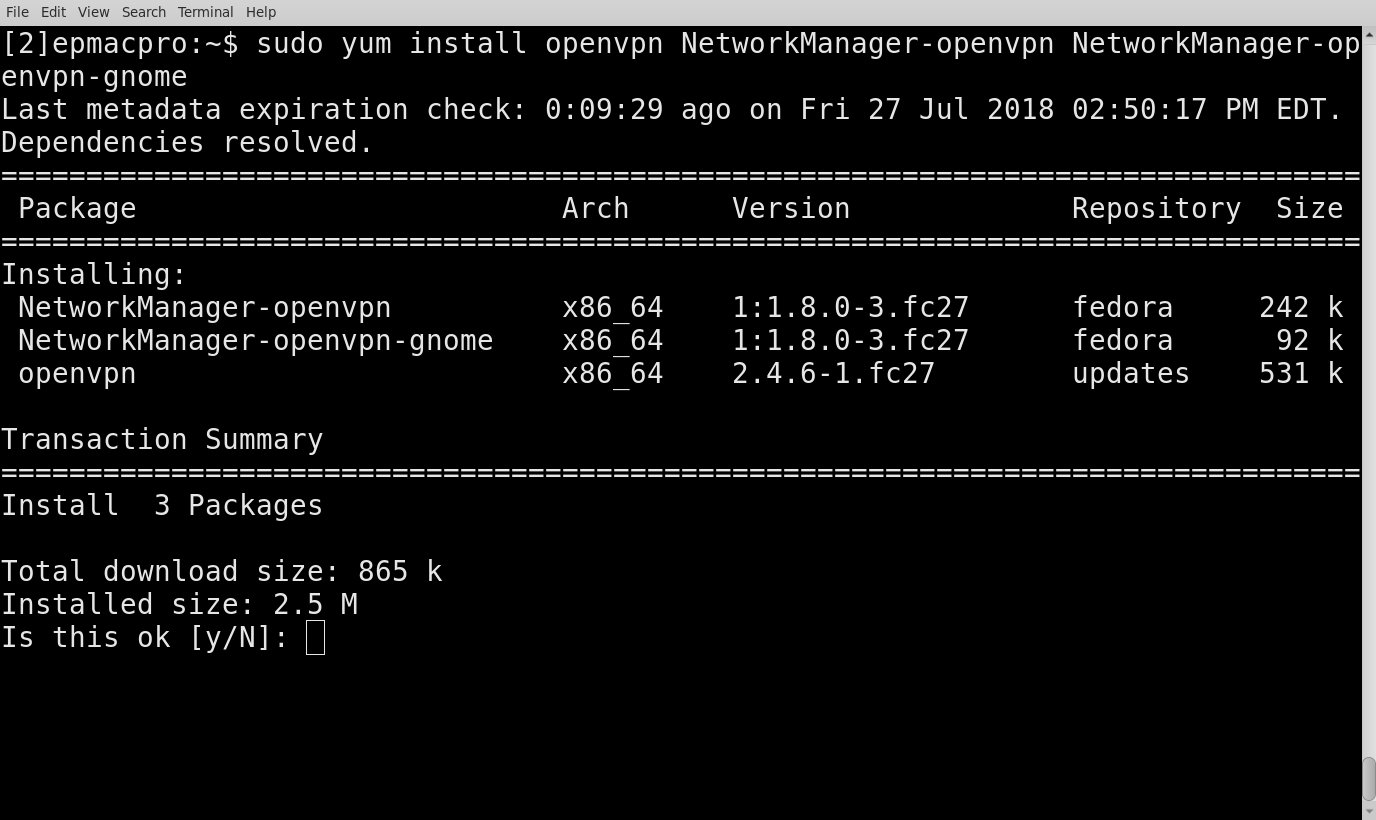
You will be asked to allow the download. To proceed type "y" then press "Enter".
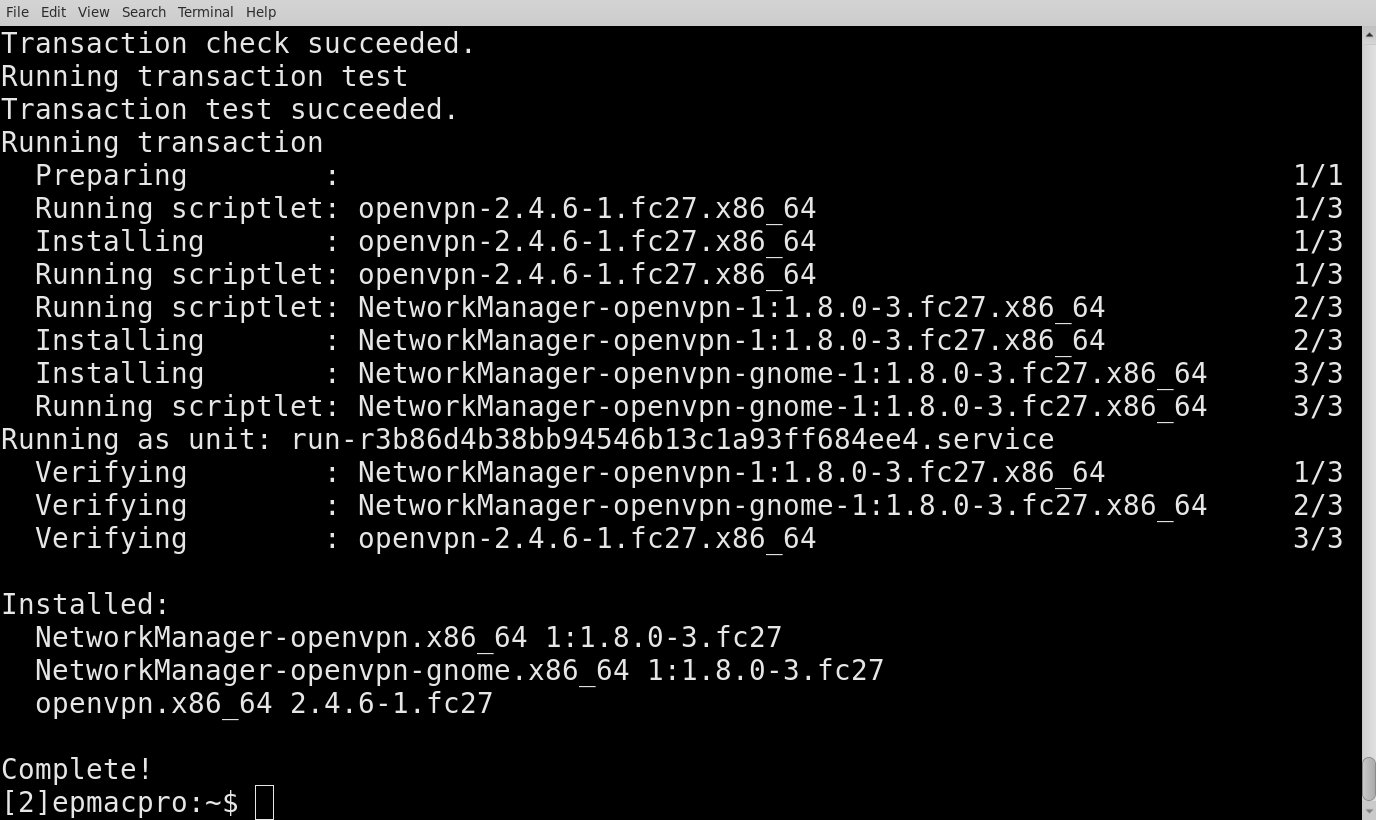
When the installation is complete, you will see the packages you installed along with a verification that the download was completed.
In your browser, navigate to https://openvpn.ias.edu. Enter your IAS credentials and press "Go"

Click on "Yourself (user-locked profile)"
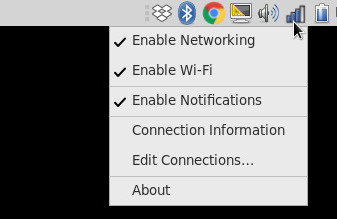
At the top right of your desktop, click on the internet options symbol and then click "Edit Connections..."
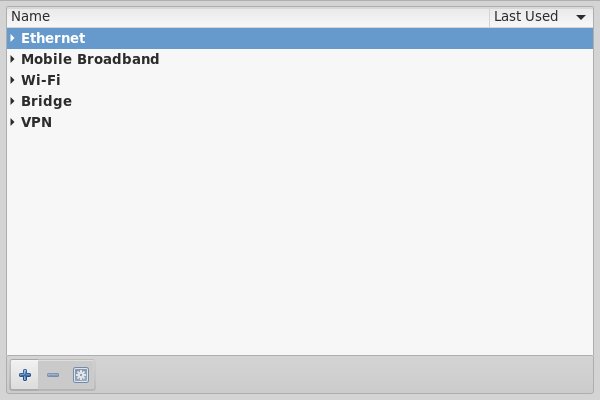
In the bottom-left of the pop-up window, click the "+" symbol to add a connection.
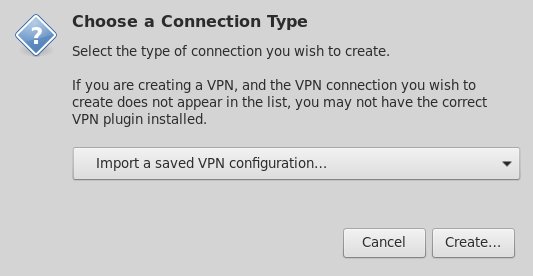
In the "Choose a Connection Type" window, open the drop-down menu and select "Import a saved VPN configuration..." then press "Create...".
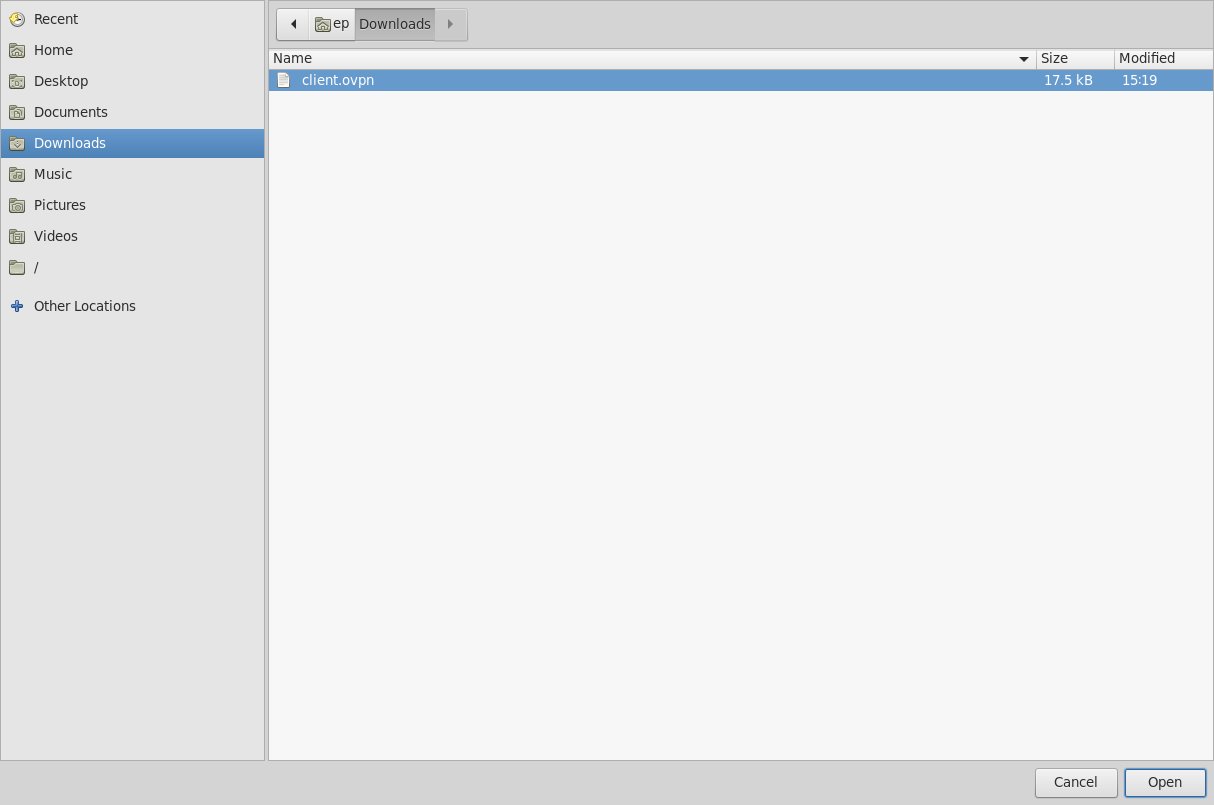
In your file manager, navigate to your default download location (usually Downloads), and select the "client.ovpn" file.
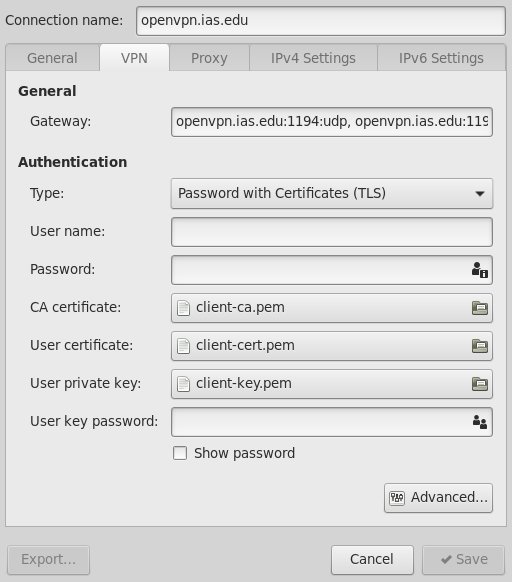
At the top of the new window, change the connection name to "openvpn.ias.edu"
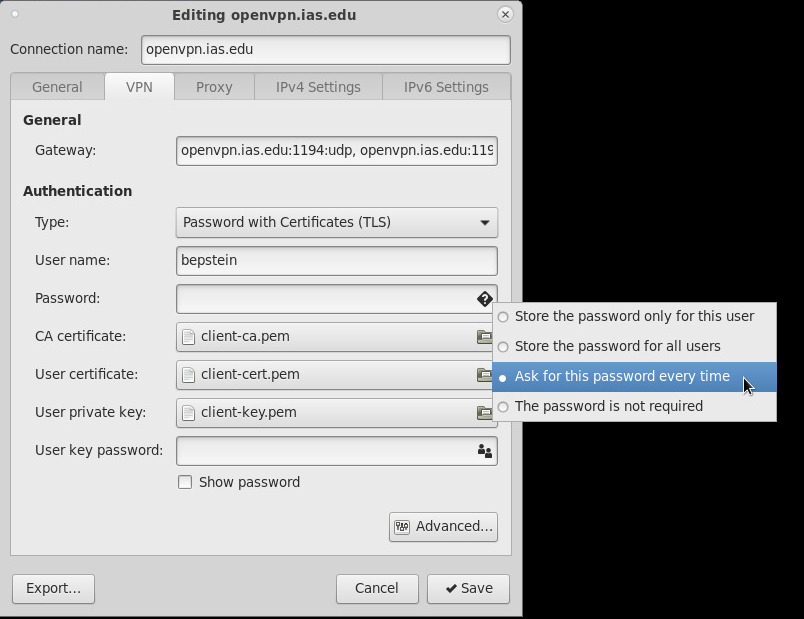
Enter your IAS username in the Username box. Click on the question mark in the password box, check "Ask for this password every time" then click "Save".
In the Internet settings, under "VPN Connections" click on "openvpn.ias.edu". It will ask you for your user credentials. At this point, if you use 2-factor authentication, you will be prompted to enter your Duo passcode.