How to connect to Public Network Printers in Windows
Check out the Printing page for a list of the ITG supported public printers.
If you want to use a printer not listed on the Printing page, please contact the Help Desk (x8044) for assistance.
Windows 10
- Press the Windows Key + R
- Type "control printers" and press return key. A "device and printers" dialog box should appear on your screen.
- Click "Add a printer"
- Find and select the printer you want to add from the "Select a device" box. Use the scroll bar to see more printers listed in the box. The box will be similar to the one below (not exact).
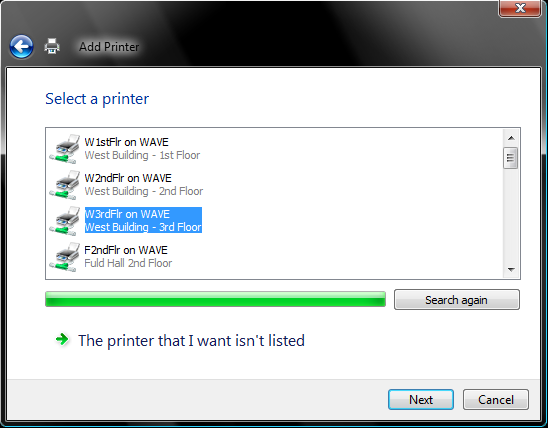 Click the Next button.
- You will be asked whether or not you want this to be your default printer. Select the checkbox if you would like to set the printer as your new default printer, and then click Next.
- Click Finish.
The printer is now setup, and you will see it listed as an option for printing in every application.
How to change your default printer
- Press the Windows Key + R
- Type "control printers" and press return key. A "device and printers" dialog box should appear on your screen.
- Right-click the icon of the printer you want to use and select Set as Default Printer from the menu.
THINGS TO REMEMBER AND GETTING HELP
Please note that letter size paper (8.5" x 11") is the default paper size in the United States. You should change the page setup for your document in the word processor before printing it. Any paper size other than letter size will cause the printer to wait for you to manually feed the paper.
If there is a problem with the print job you sent, please contact the Help Desk (askitg@ias.edu) and let us know.