Connecting to Public Network Printers using a Mac OSX
Check out the Printing page for a list of the ITG supported public printers. If you want to use a printer not listed on the Printing page, please contact the Help Desk (ext. 8044) for assistance.
1. From the Apple Menu, click System Preferences
2. Select Print & Scan or Print & Fax under the Hardware section of System Preferences.
A window similar to what is shown below is displayed.
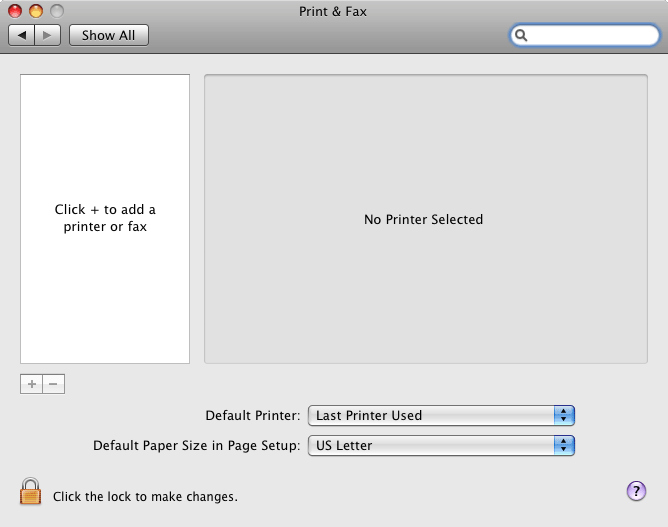
3. Make sure the padlock icon is unlock on the lower left of the Print & Scan/Fax window for you to be able to make changes. If not, click on it and enter the administrator's username and password.
4. Click on the '+' sign on the left side of the window to add a new printer.
5. Click on the IP tab.
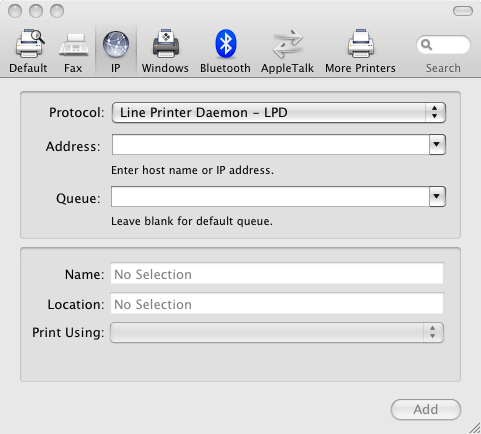
6. Select Line Printer Daemon - LPD from the list of choices for Protocol.
7. For Address, type in the following host name wave.itg.ias.edu.
8. For the Queue, type in the name of the printer such as W1stFlr (See the Printing page for a list of printers)
9. The values for Name and Location is often times the same as the value entered for the queue. In our example, we will also use W1stFlr for both the Name and Location similar to what is shown below.
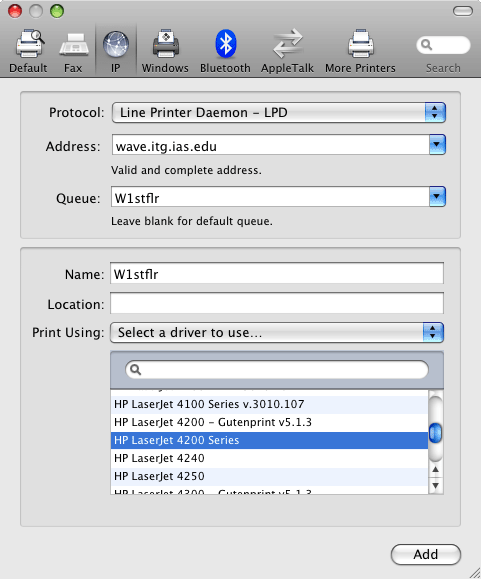
10. Under Print Using, scroll and click Select a driver to use.... Select the appropriate model for the printer on the list.
11. Click the Add button.
12. When prompted for Installable Options, leave the defaults and click Continue.
13. Your newly added network printer should now be displayed under your printer list in the Print & Fax window.
THINGS TO REMEMBER
Please note that letter size paper (8.5" x 11") is the default paper size in the United States. You should change the page setup for your document in the word processor before printing it. Any paper size other than letter size will cause the printer to wait for you to manually feed the paper.