How to install a network printer on your Windows computer

- Navigate to Control Panel and double click on Printers & Scanners.
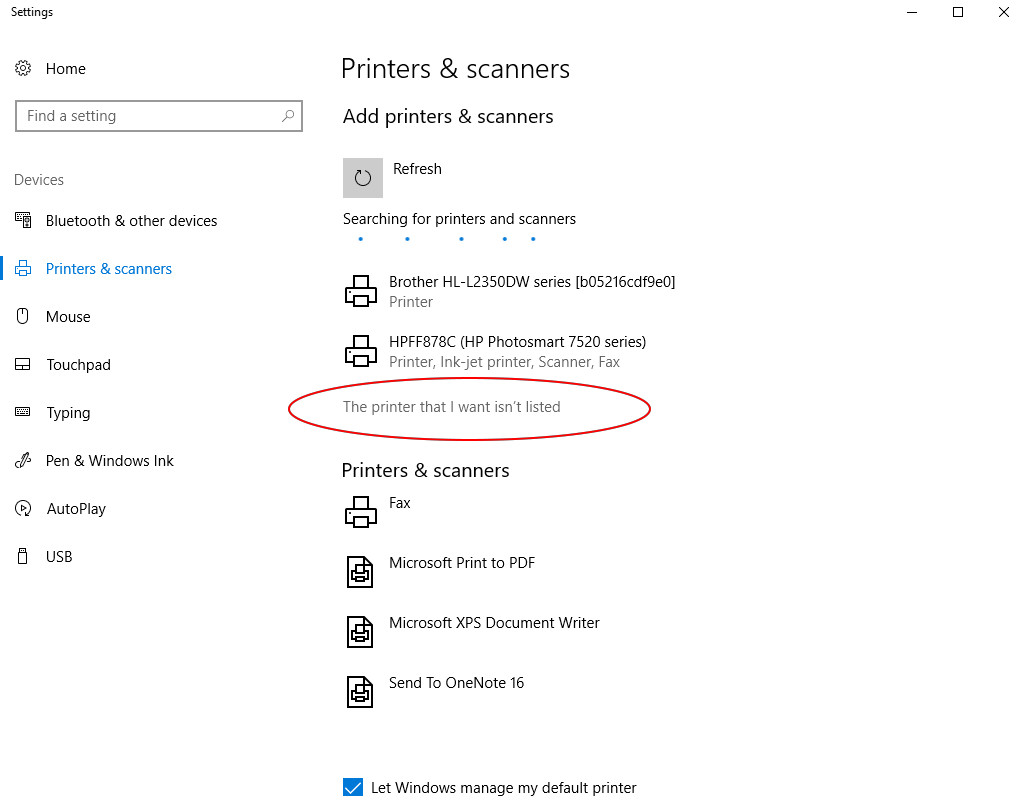
- Click the first option under Add printers & scanners named Add a printer or scanner.
- Windows will then start populating the list of devices it finds. Ignore he recommendations and instead, click The printer that I want isn't listed.
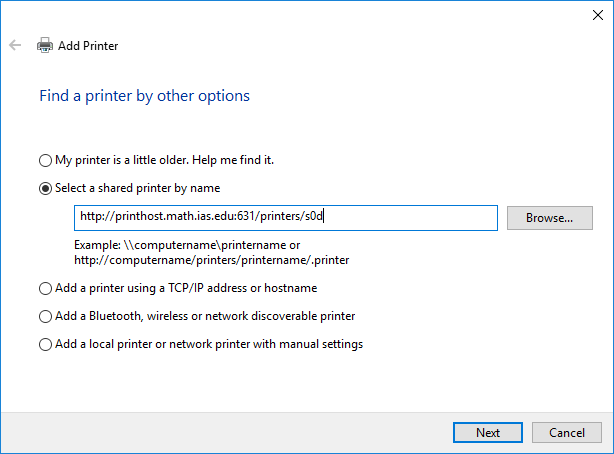
- You will now be greeted with a new window to Find a printer by other options
- Click the toggle next to the Select a shared printer by name option
- In the text input field, type: http://printhost.math.ias.edu:631/printers/printername where printername is the name of the printer that you want to install on your Windows computer. A full list of network printers can be found here.
- Click the Next button at the bottom
- Now you will be presented with a new window entitled Add Printer Wizard.
- Under Manufacturer on the left, find the manufacturer of the printer you want to install on your computer.
- Under Printers on the right, find and select the mdel of the printer that you want to install on your computer.
- Click OK at the bottom to continue

- Set up is complete. You will now be told the printer has been added and installed.
- Click the Next button.

- Click on Print a test page or the Finish button.

- You will now see the newly added printer in your list of devices:
