
How to convert from VIPRE to Windows Defender
Before you can begin using Windows Defender as your primary malware and antivirus program on your Windows 8, 8.1 or 10 desktop computer, laptop or tablet, you will need to uninstall VIPRE. Please follow the steps outliined below.
Step 1 - Uninstall VIPRE:
- Navigate to the Control Panel.
- Choose the Uninstall a Program, or Programs and Features option.
- A list of programs should be displayed. Locate VIPRE and click Uninstall or Change or Change/Remove to begin the uninstall process.
- A prompt will appear asking to Remove or Repair VIPRE. Choose Remove.
- The next prompt will ask to keep or remove data files. Choose Yes, remove all items, then click Next.
- Click Remove to begin the removal process. This may take several minutes.
- After the removal process, click Finish then restart the computer if prompted. [NOTE: After rebooting, please follow the steps below to ensure that Windows Defender's Real-time protection is enabled.]
Step 2: Confirm that Windows Defender is enabled in Windows Security
Now that VIPRE has been uninstalled from your Windows 8, 8.1 or 10 desktop computer, laptop or tablet, please verify that Windows Defender is enabed and that the virus and malware definitions are up-to-date.
Windows 10:
- Open the Windows Security app.
- Click on the Virus & threat protection tile (or the shield icon on the left menu bar).
- Click on Manage Settings under Virus & threat protection settings.
- Verify that Real-time protection is On.
It is highly recommended that you check for Virus & threat protections updates by doing the following:
- Clicking on the Check for updates link under Virus & threat protections updates.
- Click on the Check for updates button.
For additional information about Windows Defender, please proceed to the Getting Started with Windows Security's Windows Defender page.
Windows 8:
- Navigate to Control Panel.
- Change the "View by" option to Small icons.
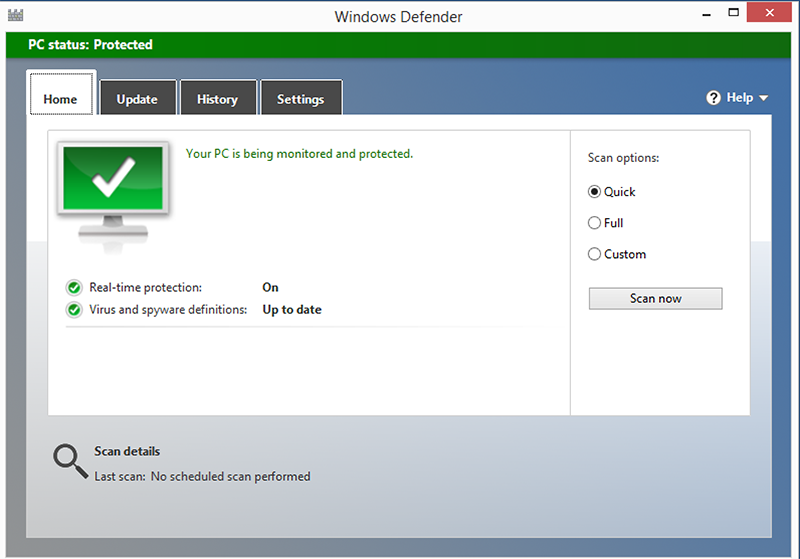
- Click on Windows Defender.
- Click on the Home tab.
- Real-time protection should be set to On.
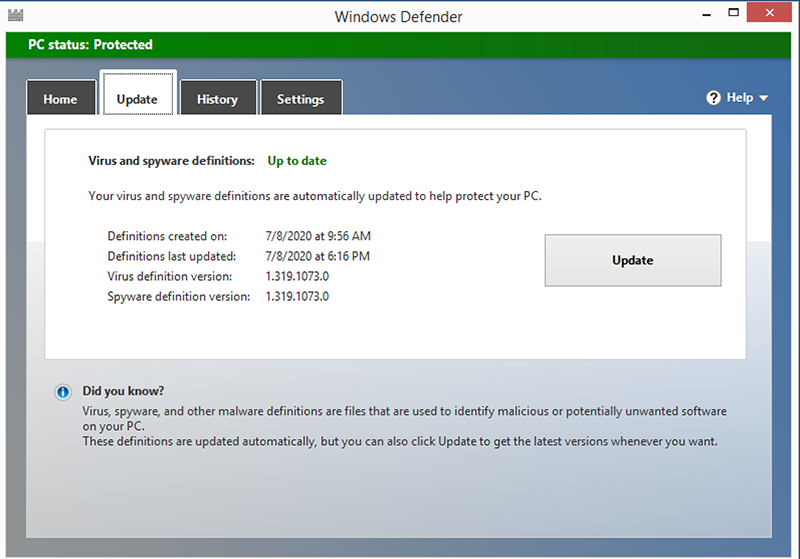
- It is highly recommended that you immediately update the virus and malware definitions by clicking on the Update tab and clicking on Update.
Windows 8.1:
- Click on the Start button, scroll through the list of installed applications until you locate Windows Defender. Click on Windows Defender.

- Click on the Home tab.
- Real-time protection should be set to On.
- It is highly recommended that you immediately update the virus and malware definitions by clicking on the Update tab and clicking on Update.
There are multiple build versions of Windows 8, Windows 8.1 and Windows 10. if you have any questions about any of the instructions on this page, or if the images that appear above don't match what you see on your personal desktop computer, laptop or tablet, please contact the IAS Help Desk assigned to your School, Department or Group:
Information Technology Group - ext. 8044 / askitg@ias.edu
The Information Technology Group provides support to School of Historical Studies, School of Social Science, Administration and programs under the Director's Office.
Mathematics Computing Department - ext. 8012 / help@math.ias.edu
Computing support for the School of Mathematics is provided by the Mathematics Computing Department.
Natural Sciences Computing Department - ext. 8030 / helpdesk@sns.ias.edu
Computing support for the School of Natural Sciences is provided by the School of Natural Sciences Computing Department.